Also worth mentioning, although I've taught myself how to read patterns over the years, I learned to crochet without reading patterns when I was kid. There's a myriad of abbreviations used in patterns and if you want to learn how to read patterns, it's essential to know them. However even though I consider myself to be a master crochet wizard, (most of) my tutorials are intended for novices & I feel that by describing the steps in detail rather than just speaking in code, they will be more easily understood. So I hope you find my instructions helpful, especially if you're only just getting hip to hooking! If you can't read patterns, it's OK; you can still learn to crochet and I will teach you the necessary terminology along the way.
Alright people, let's get down to business!
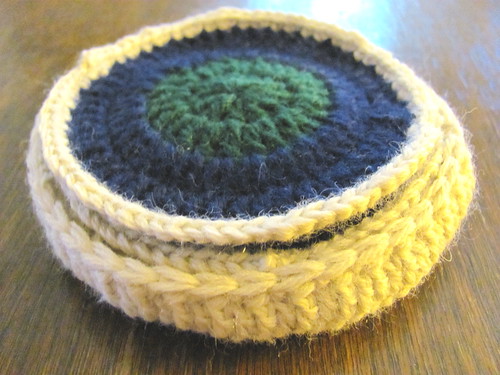
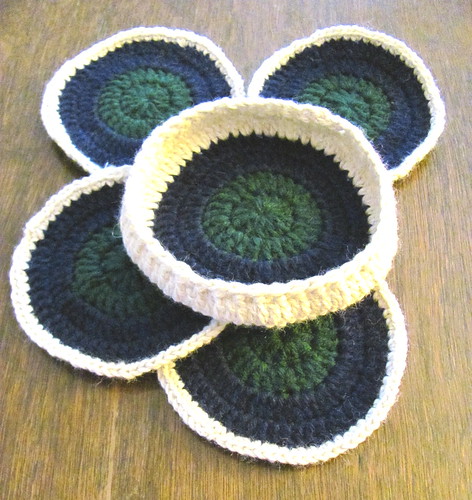
Supplies, you don't need much. Technically, if you want everything to be all one color, you only need one skein of yarn (to create 4 coasters & 1 coaster keeper) but if you want to spice things up a little bit, I suggest using at least 3 different colors. For this particular pattern I used a size F hook to create 4 1/4" diameter coasters.
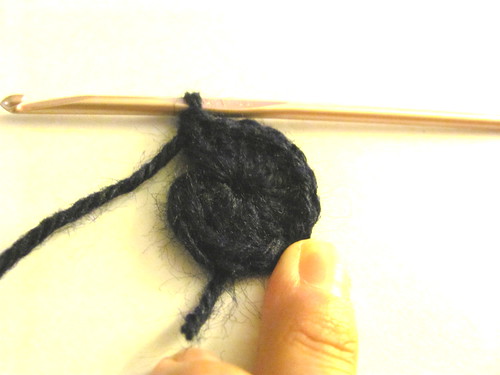
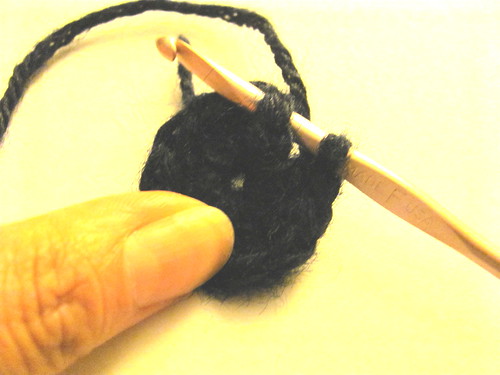
1) Chain 4. For more instructions on basic crochet steps, click HERE.

2) HDC into the 1st chain.

3) Now you're going to start making your first "round". Although it may seem crazy at first, you're going to make a total of 13 HDC's all in the first chain.

Keep it going...!
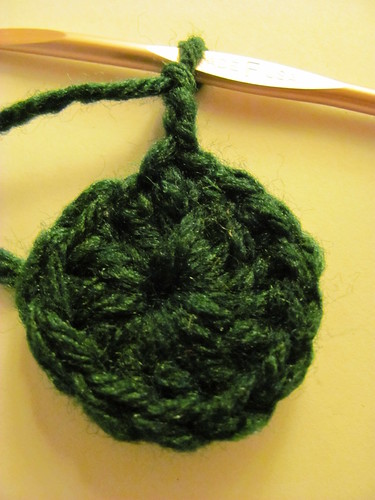
4) When you get to the end of the round, connect your last HDC to the top of the starter chain with a slip stitch, tie off and hide your excess behind the back.
Now your first round is complete!

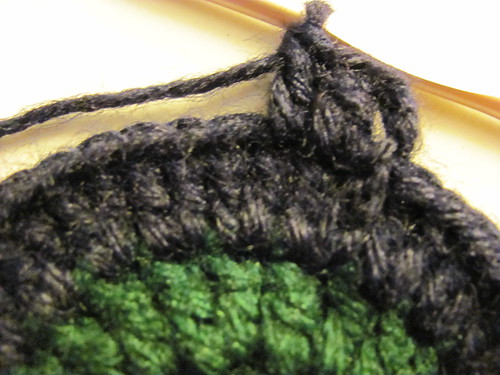
5) Round 2 starts similar to Round 1 by chaining up 3.
6) Now you're going to make 2 HDCs in the top of each HDC from Round 1. Because we're doing 2 stitches in one, this is a form of "increasing", or "inc" in pattern terms.
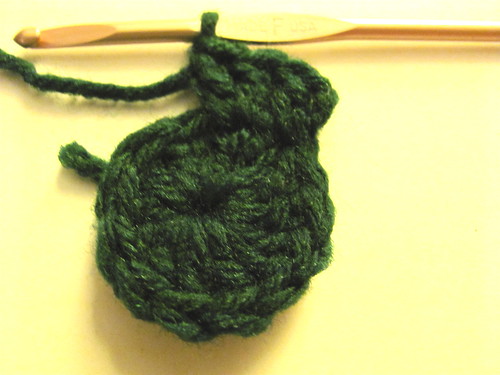
7) When you get to the end of the round, connect your last HDC to the top of the starter chain with a slip stitch, tie off and hide your excess behind the back.
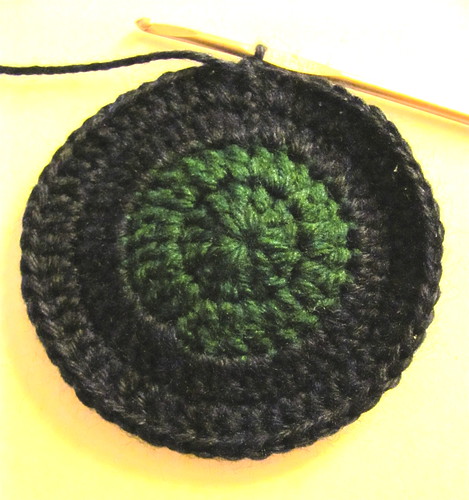
8) If you're using different colors of yarn, you might want to switch to a new color here. For Round 3, repeat the steps for Round 2 but at the end connect with a slip stitch and chain up 3 to start the next round (instead of tying off).


9) For Round 4 we're "decreasing" ("dec" in pattern terms) and only making 1 HDC in each HDC of the previous round. Start by chaining up 3 (as mentioned above) and then 1 HDC in 1 all around.
10) When you get to the end of the round, connect your last HDC to the top of the starter chain with a slip stitch, tie off and hide your excess behind the back.
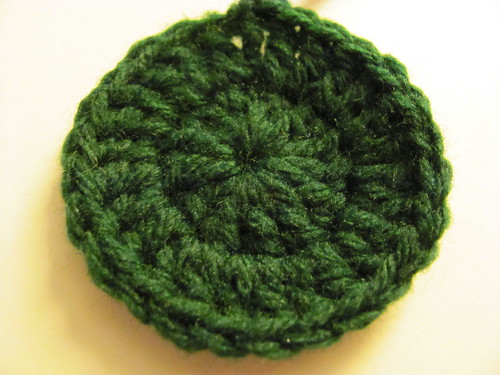
11) If you're using different colors of yarn, you might want to switch to a new color here. For Round 5, the final round, you're going to follow a tiny alternating pattern. 2 DC (double crochet) in 1, 1 DC in 1, 2 DC in 1, 1 DC in 1...and so on all the way around.
12) When you get to the end of the round, connect your last DC to the top of the starter chain with a slip stitch, tie off and hide your excess behind the back. Now your 1st coaster is complete!
Creating the Coaster Keeper
1) Follow the steps for creating a coaster up to step 10 which ends at Round 4.
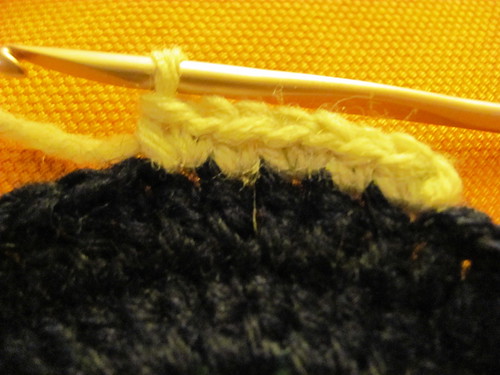
2) If you're using different colors of yarn, you might want to switch to a new color here. Starting Round 5, you're going to follow a tiny alternating pattern. 2 HDC in 1, 1 HDC in 1, 2 HDC in 1, 1 HDC in 1...and so on all the way around. But to create the bowl shape of the keeper with the "right side" showing on the outside, you need to flip the coaster/keeper over and start on the "wrong side" by chaining up 3. When you get to the end of the round, connect your last HDC to the top of the starter chain with a slip stitch, tie off and hide your excess behind the back.
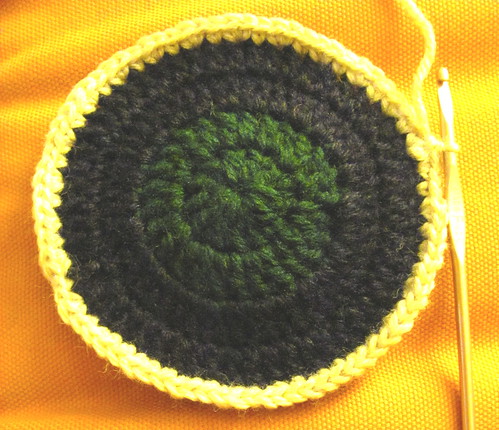
3) For Round 6 we're "decreasing" ("dec" in pattern terms) and only making 1 HDC in each HDC of the previous round. Start by chaining up 3 and then 1 HDC in 1 all around.
4) At the end of Round 6, don't tie off. Connect your last HDC to the top of the starter chain with a slip stitch. Starting Round 7, the final round, chain 1 and DC 1 in 1. Then you're going to follow a tiny alternating pattern, 1 DC in 1, 2 DC in 1, 1 HDC in 1, 2 DC in 1...and so on all the way around. Because you're continuing to decrease on this round, don't hold your yarn too tight or else the edge will look wavy. If you're really afraid of holding the yarn too tight, you can even switch to a larger hook.
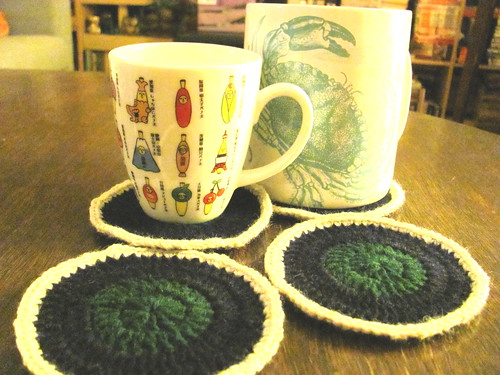
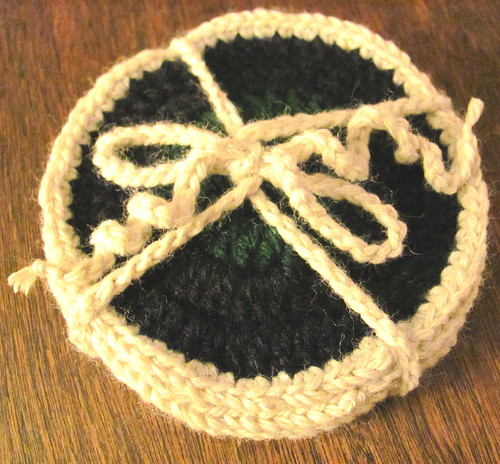
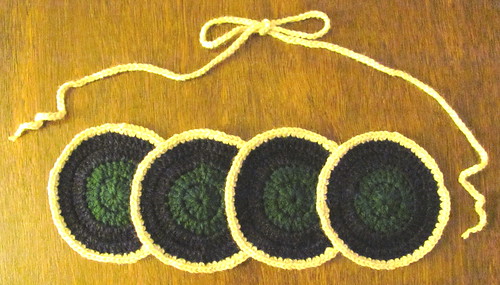
Voila! Now you have an adorable little coaster keeper and really, you have to keep just coasters in it. You can now use this pattern to create any number of keepers for your special things.