
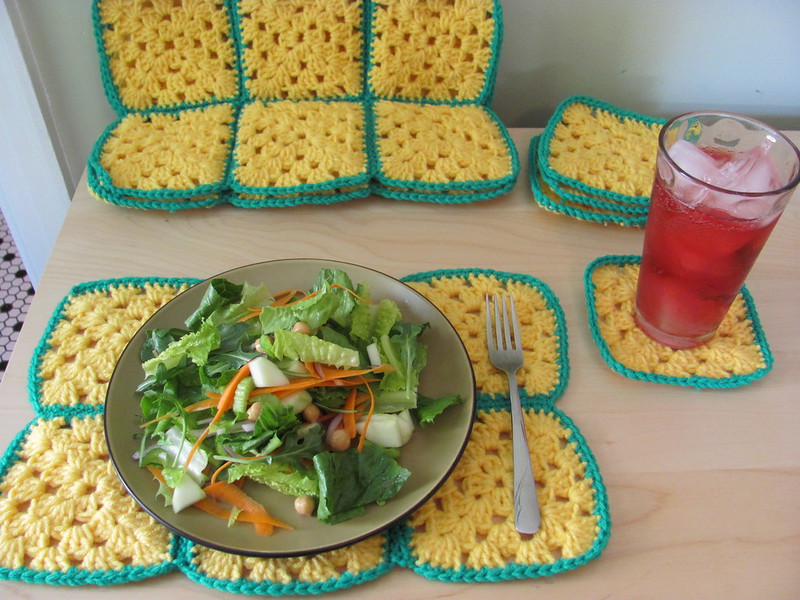
(Most) yarn is very absorbant so it will protect surfaces from moisture. These gifts are also easy to store, wash and dry. Just throw them in the washing machine and then let them air dry.
It seems like a lot of people either don't know how to crochet or don't know what to crochet so I created this crochet tutorial for beginner/intermediate crochet-ers. If you've ever just wanted to learn how to crochet or wanted to crochet something simple and very useful in less than a week, this is just the tutorial for you!
What you'll need

- 2 standard skeins of yarn (364 yds/333 m) (I used Red Heart Super Saver synthetic wool blends)
- Size J crochet hook
- Scissors
Crocheting the coasters
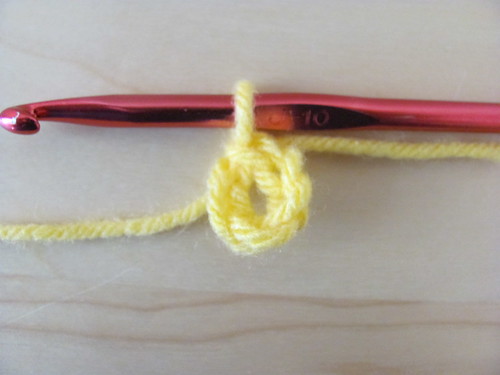
Step 1
Chain 5.

Step 2
Connect the 5th chain to the 1st chain to create a ring.
Step 3
Chain up 3.
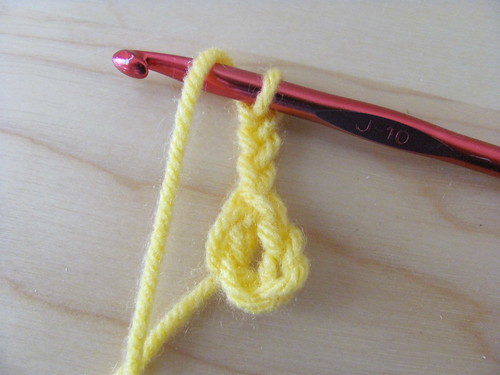
Step 4
Half double crochet 11 stitches around the ring (make 12 stitches total which includes the 3 you just chained up [3 chain stitches = 1 half double crochet]).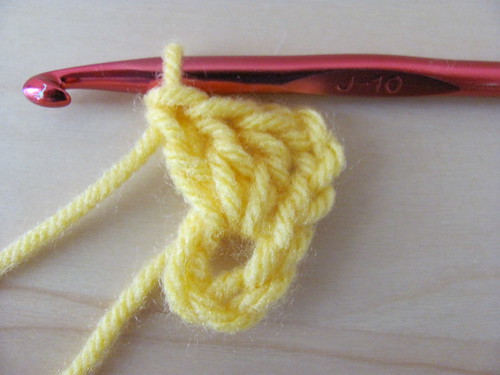
Step 5
Connect your last stitch to the top of the 3rd chain.
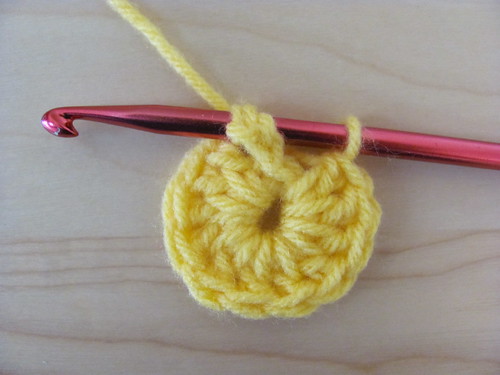
Yay! Now you know how to create a circle or a button. This is the first step to any number of creations and embellishments. You can create bigger circles by adding more chains and/or half double crochet stitches around. Alternately, you can create smaller circles by using less.
Step 6
Chain up 3.
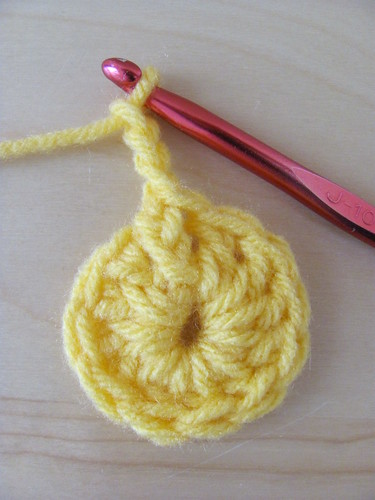
Step 7
Now you're going to begin creating the corners of your granny square. These edges created from double crochet stitches are also known as scallops. On the first corner, you will crochet 5 HDCs (HDC = half double crochet stitches) in the same loop/hole as your 3 chains. Then chain 1, crochet 6 HDCs in the next loop, continuing the pattern all the way around.
Step 8
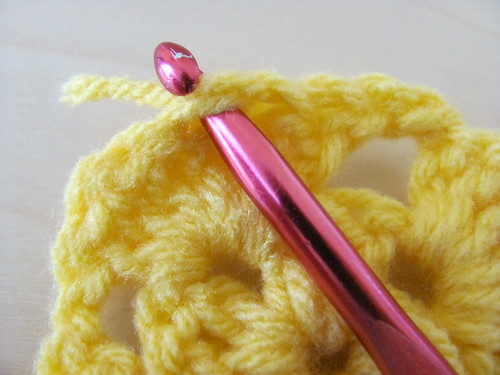
After you've created your last scallop, connect your last stitch to the top of the 3rd chain.
Step 9
Once you've connected the stitches, you can tie off and cut your yarn, leaving enough excess to hide your loose end on the wrong side of the square. Hiding the loose end is a simple process of weaving the yarn back through the loops of the wrong side of the square. This is a technique which you will become very familiar with the longer you crochet!
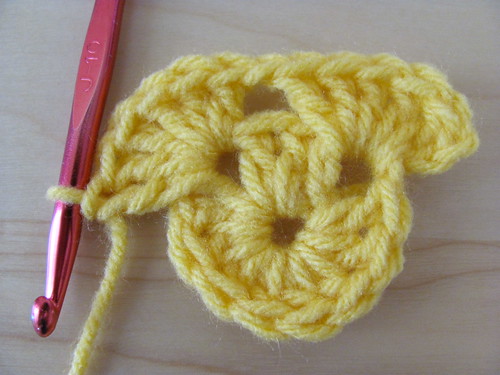
Step 10
This is similar to Step 7. The only thing different is that after you've created a scallop, you chain 1, crochet 3 HDCs in the next loop, chain 1 and create your next scallop. After you've created your last (fourth) scallop, connect your last stitch to the top of the 3rd chain. Repeat step 9 and now your granny square is growing!

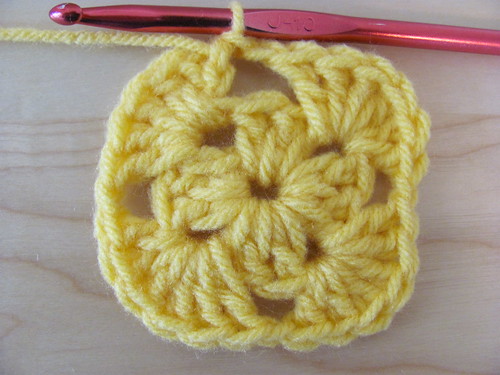
Step 11
This is the final row in your granny square. It starts just like Step 10. Create a scallop, chain 1, crochet 3 HDCs in the next loop, chain 1, crochet 3 HDCs in the next loop, chain 1 and create your next scallop. After you've created your last (fourth) scallop, connect your last stitch to the top of the 3rd chain. Repeat step 9 and now your granny square is finished. Now you know the basics of creating a granny square and the world is your scallop!
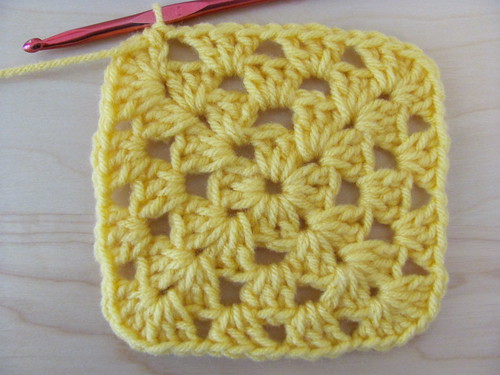
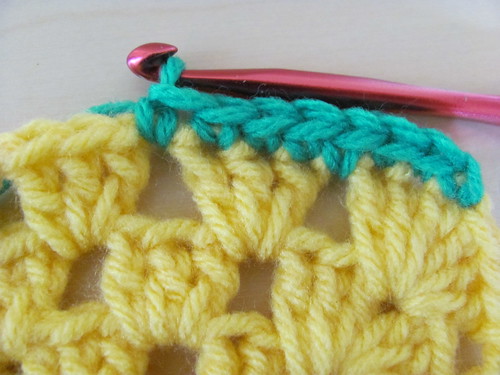
Step 12
Now you're going to create a border around your granny square with the other yarn color. This is simply done by crocheting all around the square.
Make sure to crochet "inside" each loop.
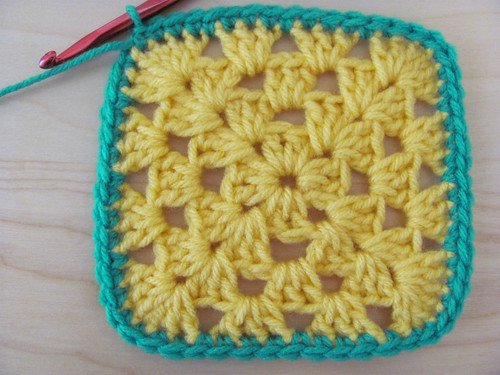
Step 13
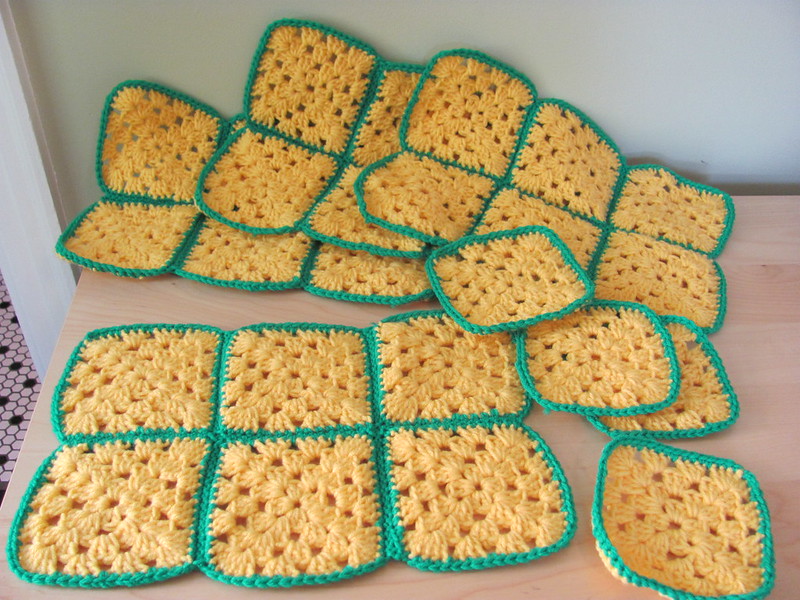
Once you've crocheted all the way around the square, repeat step 9. Now you have a finished coaster. Now you just need to make a total of 15 more squares just like this. 4 will remain as coasters, the rest will be crocheted together to form the placemats.
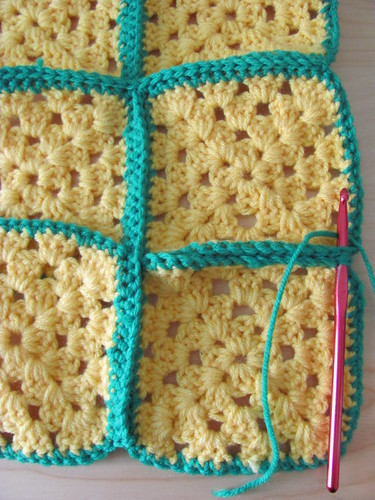
Assembling the placemats
Step 1
To begin assembling the placemats, you need 6 completed squares. To get an idea of how the placemat is going to be assembled, arrange all the squares in 2 rows of 3 with the wrong side up.

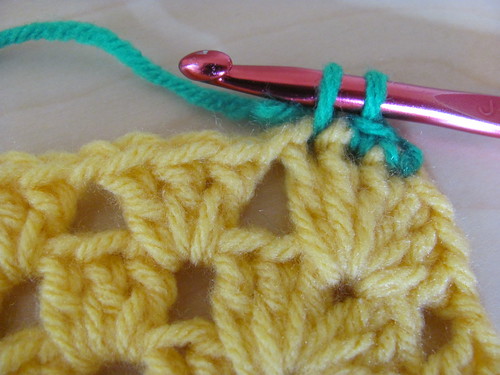
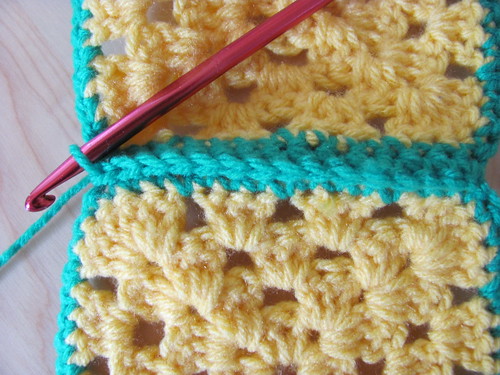
Step 2
Crochet 2 of the squares together, wrong sides facing out (right sides facing inside). Start at right corner of the square facing you by inserting your hook through the top of the flush edges connecting the 2 squares.


Step 3
Crochet all the way across to the left edge.
Step 4
OK, this part is a little tricky but by the time you've finished your 4th placemat, you'll surely have it mastered. You're now going to connect your 2nd set of squares to the 1st set. Repeat step 2 and make sure that your first stitch is very taught. Repeat step 3.
Step 5
Time to connect the 3rd set of squares. Repeat step 4.

Step 6
Now that you've reached the end of the line, tie off and hide your loose end.

Step 7
Now it's time to connect the rest of the squares inside of your placemat. You can start at either end of the placemat. Repeat step 2.

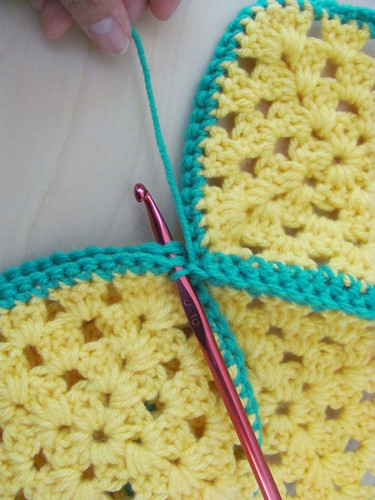
Step 8
As you're crocheting along, when you get to the intersection of 4 square corners, simply continue crocheting over the already connected squares to connect all 4. Make sure the yarn is extra taught.

Step 9

Step 10
To connect the final squares, repeat steps 7-9.

Congratulations! Now you've finished your first placemat. Flip it over and admire the detail of your beautifully connected squares! Only 3 more placemats to go. By the time you finish the last one you'll be an expert!

Hello Gabriele. Nice to "meet" you! I've just started following your blog. Looking forward to reading more of you. :D
ReplyDeleteThis is such a lovely idea,I am not talented enough to do this ;) Do you mind following each other?xx Melodylouise
ReplyDeleteWith pleasure! I've just started following you. Looking forward to reading more of you too! :)
DeleteThanks so much,following you too now ;) xx
ReplyDeleteFound your blog via your LJ post on crochetcrochet :D Just popping by to tell you that those colors are FAB! I never would've thought to use yellow and turquoise but wow, they really work together. :)
ReplyDeleteHey Cara,
DeleteAh, it must look different on your computer. The 'turquoise' is actually kelly green, but I'm sure that turquoise would make an equally bold statement.
Amazing!what a good and original gift!good post!
ReplyDeleteI invite you to visit my blog and if you want to follow each other!
Kisses dear
Gracias chica! I've just started following your blog. Reading it will help me practice my Spanish. Ahora, es muy mal! Nececito practicar mucho.
DeleteHi my dear friend, I am really happy to meet you. You have a very nice blog and I like crochet like me.. These placemats are so so pretty that yesterday I showed your crochet placemats to my mother. She liked them too..
ReplyDeleteI am your newest member..:))and I will follow all your posts more closer..:))
All best wishes and all happy days...:))
Ugh, sorry it's taken me two years to reply to this comment! I didn't see it until now. Thank you so much visiting my blog and showing your affection. I hope to continue to share more inspiration with you.
DeleteHi :). I just started crocheting a couple of months ago and was ecstatic to find this pattern :). Please forgive me since I'm new at the art, but it looks as if part of the instructions for step 7 are missing? In the pictures it looks like you are skipping loops making corners, but when I follow the pattern, I get a wavy circle :/
ReplyDeleteHey there. Sorry it's taken me a little while to reply. I've been struggling to stay ontop of replying to everyone's comments. I'm sorry but I'm not sure if I understand your inquiry. I don't believe there's any steps missing. The only advice I can give is that you need to crochet very tightly when you are connecting each square.
Delete